


 Valentine's Day is right around the corner. Add some holiday pizazz to your outfit with a wired heart brooch.
 Sweet and so simple to make. And I'll show you how to personalize it, too!
For supplies, you'll need some wire, plyers with snips, small rhinestone embellishments, a short piece of wired ribbon, and a jewelry pin. The wire should be workable but not so soft that it won't retain it's shape. I found a lovely red wire, almost ruby, that is probably a 20g weight which worked really well.
 Begin by forming a small loop at the end of the wire.
 Gently curve the wire to form the side of the heart.
 Decide how tall you want your heart to be, then bend the wire to form a tight angle.
 Reverse the process for the first side, forming a gentle curve that ends in a tight loop, then cut the wire.
 Repeat the process to form a second heart. Slip the end of one heart through the other, connecting the hearts.
 Apply a rhinestone to the connection of the hearts. I just used hot glue, and secured the hearts together under the rhinestone.
 Weave the ribbon through the hearts, trimming the ends to an appealing shape. Make note to cover the wire of the hearts as little as possible.
 Attach the jewelry pin to the back of the ribbon.
 The pin is lovely and complete at this point. However...
 I decided to add yet another heart to represent our son.
 You can personalize yours with as many hearts as you need.And it's ready to dress up any outfit.
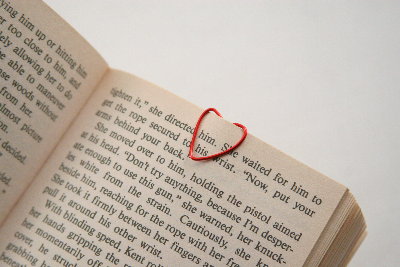 As an added bonus, if you have extra wire, the little hearts make great bookmarks!
Let me know if you give this a try! I'd love to see yours!
And be sure to check out the endless list of inspirational ideas at my home page childmade.com.

I'll be linking to some of the fabulous link parties listed on the right sidebar ... but really, that's a LOT of parties! I probably won't get to them all, but you should stop in and visit a few yourself. While you're at it, stop by my home page and add a few of your own links to my perpetual party!